Table of Contents
How to Grow Shasta Daisy Flowers
How you decide to start your daisies is up to you. Though some gardeners like to begin with seeds, young Shasta Daisy plants are widely available in most nurseries, home and garden stores, and even groceries, starting in the spring.
Shasta Daisies are inexpensive, and because they are great at resisting insects and disease, purchasing young plants should not be a problem. There are many varieties to choose from, so allow yourself to peruse the plant aisles and find the ones that call to you.
1. It’s All About the Soil
Perhaps the most important thing to remember when growing Shasta Daisy flowers is the soil. These beauties are partial to moist dirt but want something that drains well. In fact, your little lovelies would rather be too dry than too wet, so be mindful about overwatering.
Find spots in your garden and flower beds that drain well. If you are unsure of your soil condition, place a little organic matter underneath and around the roots of each plant. If you are placing your plants in containers, add some rocks, sand, gypsum powder, or even compost to the bottom to help the soil drain effectively. This will ensure that the water can’t pool around the plant’s roots, causing potential rot to happen and leading to a very unhappy plant.
As the plants mature, they won’t be as particular about soil conditions, but always err on the side of underwatering versus overwatering.
2. Give Me Space!
As Shasta Daisy varieties have become increasingly prevalent, you can find everything from ultra-compact ones to those that will spread out and take over a fair amount of space in your beds over time. When placing your plants, make sure to not crowd them. Digging holes that are at least 12-18” apart will be ideal, even for the more compact varieties, because good spacing is needed for the air to circulate between them.
Some gardeners even find they eventually need to divide their thriving beauties to give them more space to roam.
One of the many benefits of these plants is that they tend to be bug and disease-free. Give them some space and they will stay that way.
3. Here Comes the Sun
The second important tip for growing great Shasta Daisies is to remember they are sun worshippers. Though the more mature plants can tolerate some shade, these beauties really prefer to be in a good, direct sunspot in your garden.
Try to make sure your daisies are getting at least 7-8 hours of sun a day. In particularly hot climates, they may start to look a little droopy by afternoon, but will still prefer intense sun over too much shade.
Because of their love for the sun, Shasta Daisies will do best if you wait to plant them until the days are longer and any chance of frost has passed. Giving these flowers adequate light and warm temperatures will ensure months of repeated blooms, oftentimes into fall, depending on your location.
4. Take It Off and Pack It In
Perhaps one of the hardest things for new gardeners to remember is that once the color show of summer is over, Shasta Daisies still need some care. As the days turn shorter and colder, it’s important to spend time preparing your plant for winter.
The easiest way to do this is to deadhead any remaining flowers off the plant. Some people prefer to do this all summer long, as it may make the plant bloom better. But regardless, spending time deadheading your daisies after they’ve finished their blooming cycle will help guarantee they rest easy through winter and come back ready to bloom in the spring.
Another important part of end-of-summer care is cutting back the leaves of the plant until they are almost at ground level. I promise this will not damage your plant! Afterward, place a layer of mulch around the base and lightly pack it down. A good mulch will ensure protection in the winter and continue to help with that ever-important soil drainage during wetter months.
How Do I Ensure My Thumb Will Turn Green?
As I mentioned earlier, we don’t all have what it takes to just throw some gorgeous greenery in the ground and wait for it to come up roses. (Or any flower, for that matter!) That said, the joy of growing something in your own dirt can be highly rewarding, even if you don’t think you’re going to be very good at it. Once you pick out the plants that appeal to you, here are a handful of things to keep in mind that will get you on the right track.
Understand Your Growing Zone
Different plants will thrive in different climates. A Hibiscus tree may not fare well in the far North, just like Delphiniums don’t like dry, arid areas. The USDA has specific zones outlined for what plants will thrive at what temperatures, based on the average winter temperature in each of those zones. Get comfortable with this table and where your home falls in the different zones. Then, look for plants that will be happy where you are.
Start Small
It’s easy to want to load the car with a little of everything and get your gardening on! But remember, depending on how much space, sun, resources, and time you have, going too big too soon may make even the most enthusiastic gardener frustrated. Not only can plants be expensive, but the products to properly care for them can be, too. Pick a few favorites and see how they do. Plants are restocked all summer long. There will always be more when you’re ready.
Learn Your Plant’s Parts
Plants, like all living organisms, have different parts that perform different functions. Knowing the difference between a root and a shoot, or a leaf and a stem will make the experience more enjoyable and give you needed knowledge when researching problems or asking questions about your leafy pals.
Learn to Lean on Others
Plant people are no different than anyone else who has a passion for something. They want to share! Finding others in your community who already got bit by the green-thumb bug will prove to be helpful as you begin your growing journey. Don’t worry…You’ll get a chance to pay it forward, too!
Be Prepared
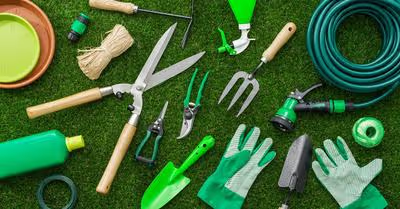
As a new gardener, you don’t need to rush out to the local nursery and buy all the gadgets available. There are probably a handful you should consider investing in. Think about what you may already have that can double as a garden tool, or consider asking a neighbor if you can borrow one or two. As I said before, gardeners like to share – not just their knowledge, but the tools of their trade as well!
And Be Prepared for Trial and Error
Just like with any new hobby, there are going to be things that work for you and things that don’t. Most plants are very forgiving. It may take a few tries, but eventually, you will figure out what grows in your dirt and climate, which plants are susceptible to the wildlife in your area, and which flowers appeal to you the most. Be patient with yourself and your plants and be curious about the process.
Recent Articles


