Table of Contents
Know What You’re Looking At
Before you start setting anything up, you need to know what it is that you are looking at. Knowing the different parts of the fishing rod, and what the name is for each one can make the whole process a lot easier.
The Handle
This is near the bottom part of the rod and is also called the grip because it often has a soft rubberized grip around that section for more comfortable holding.
The Butt
This is the bottom area of the fishing rod where there is a larger, typically round, section. This prevents your hand from losing hold of the rod if a large fish pulls hard enough to yank it from your grip.
The Tip and Guides
The tip is the top section of the rod where the pole is the most flexible. This allows for the fishing pole to bend. The guides are the rings that are along the tip of the rod that aligns your fishing line.
The Ferrule
This is the area where the two parts of the rod fit together. There are technically two ferrules on each rod, the male ferrule is the larger piece that fits directly onto the female ferrule.
The Reel
The mechanism that turns the fishing line so you can cast and bring in the line.
The Lure
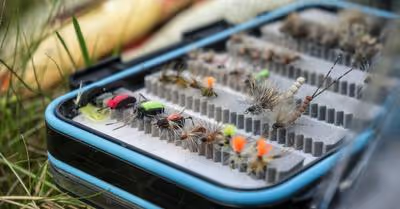
This piece is attached to the end of the line that works as an artificial bait to help attract fish to the line.
Wipe It Down Thoroughly
Whether you have rented a fishing rod for the day, or invested in a new one for future fishing trips, you will want to clean the rod before you use it. Dirt, dust, and small particles that get on the rod can cause damage by scratching the surface. Wiping down the rod with a clean, dry cloth will help remove any particles so you won’t damage it.
You will also want to thoroughly clean the ferrule. This can be done with the cloth, but you will also want to get a deeper clean with a cotton ball or Q-tip.
Assembling the Pieces
Step 1: Connect the Rod Pieces
To start assembling the fishing rod, you will need to lay both pieces on a table or desk and identify which one is the male or female. You can tell by the size because the male will be larger. Take the two pieces of the pole and place the large male ferrule over the smaller female ferrule. Most rods will lock together by rotating the pieces until they are firmly in place.
The easiest way to do this is by holding the female ferrule in place while twisting the male part around it until it is tight.
Step 2: Attach the Fishing Reel
The reel will be attached to the rod near an opening called the reel seat. This is a section that allows a flat plastic piece to slide under two slight openings, with a ring around the bottom opening to tighten it. The reel comes with an arm-like piece with a flat intersecting piece attached. This flat piece is what will attach to the reel seat.
To do this, you will lay the pole flat on a table, then move the top section of the flat piece of the reel underneath the opening on the higher part of the rod. This will allow moving the flat piece up and under the section, and allow the piece to lay flat against the rod. Next, slide the piece under the lower section’s opening so that it is held to the rod loosely.
There will be a ring around the bottom section, which will rotate when you turn it. This piece should thread up and over the bottom section near the lower opening. Rotate this ring around the threaded section until it is firmly in place and no longer moves.
Step 3: Unwind the Thread
You will need to lift up the bale arm – or the metal arch that is on the top of the reel – and flip it until it is on the other side of the reel and you can reach the line of thread. Find the end of the thread, and begin to unwind it. The spool should unwind in the direction that the reel spins.
Step 4: Thread the Line
Once you have the end of the thread in your hand and unwound the spool a bit, you will begin to thread the line through the guides on the fishing rod. Remember, the guides are the rings that are spaced along the fishing rod. Begin with the one closest to the reel and slowly work your way up to the tip and leaving a bit of extra line at the end for adding your lure.
Tip: Be careful not to unwind the thread too quickly because it could cause the line to tangle! Work slowly, making sure that there are no knots.
Step 5: Close the Bale Arm
Once you have threaded the line all the way to the tip’s guide, you want to go back to the reel and close the bale arm. This means that you will pull the metal arch back to the position it was originally in. Once the arm is closed, you can tug gently on the fishing line to make sure that no more line comes out.
Step 5: Attach Your Lure
Choosing a lure depends on multiple factors, but a good starting option that works for multiple fish and areas is a spinner, which has a metal piece that spins as the water and waves move it. To attach the lure, find the end piece of it with a small ring. Thread the line through the ring, then wind the rest of the line back around itself. This should look similar to a twist-tie.
Wrap the line around at least five times. Next, you will take the free end of the line and loop it through the first loop of the line near the ring. Then, pull both ends of the line at the same time to tighten the knot.
Recent Articles


