Table of Contents
Why was flint such a common material for stone tools?
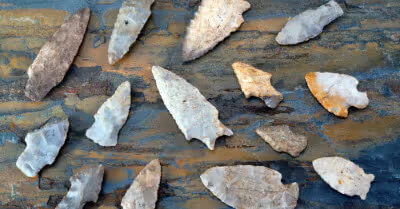
Flint is a great material for stone tools of all kinds. People all over the world used flint to make tools, so it is no surprise that it was used for arrowheads in North America.
Flint makes hard, durable, and sharp tools. Many types of stone are too soft to make tools out of; others cannot easily be worked into sharp tools. You could not use a weak material such as sandstone to make tools.
People knew that flint was a good material to make tools out of long before the Americas were inhabited. Some flint tools in the old world are up to 800,000 years old.
Flint also breaks in a predictable way. An experienced flintknapper can use the same technique they always use and end up with a sharp edge each time.
Other stones are harder to work as they break unpredictably. Some types of stone will simply splinter if you try to work them into tools.
Flint is also commonplace. While common gemstones such as jasper and agate make good tools, flint is much easier to find. While obsidian is easy to find in many places, it is not available everywhere.
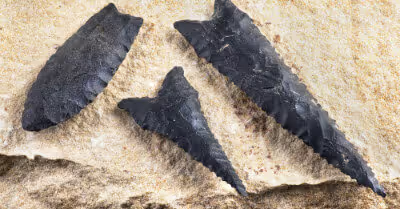
Flint is not necessarily the best material to make tools out of. Obsidian (volcanic glass) is probably the best choice, as an obsidian edge is better than an edge made out of any other material. Not even steel tools are as sharp as obsidian tools.
Do people still make stone tools?
Yes, more than a few hobbyists make stone tools using the same techniques people used in the past. Stone tool making is known as flintknapping, and it appeals to people interested in primitive skills and survival.
Hobbyists make tools out of the same materials as ancient people did, including flint. Some people also make tools out of relatively modern materials such as glass and ceramic.
Not every piece of flint is as good as every other piece. You might have to discard a piece if it is too hard to work with. If a piece of flint or other stone makes a high-pitched sound when you strike it, it will usually be good for making a tool.
How to make a stone arrowhead
First, you will shape a rock into a rough flake. Then, you will use pressure flaking to shape the flake into an arrowhead. This takes practice; it isn't something you are likely to get right the first time.
You need to find a good rock. Select a type of stone that is good for tool-making - you will get poor results if you pick up an ordinary grey stone.
A stone should be free of cracks, or else it will break apart before you finish shaping it. The first stone you find, which you will make your arrowhead out of, is called the core.
Strike stones together to create a sharp fragment
After finding a good stone to use as your core, you need a hammerstone. You will strike the hammerstone against your core to create a sharp fragment.
While this is not always necessary, you can find a third stone, known as a platform. A platform should have a sharp angle on it.
If you put the core on the platform and then strike the hammerstone against it, you can create a good fragment. Sometimes, a platform is not necessary, but try using one if you are having trouble without one.
A fragment should be long and fairly thin. It does not have to look much like an arrowhead at first. If it is too thick, it will not make a good arrowhead, and if it is too thin, it will break when you try to shape it.
Shape the sharp fragment into an arrowhead
The stone around the edges of the fragment is weaker than the stone inside of it. Use a stone to chip off the weaker material around the outside of the fragment, leaving the stronger material inside it. Remove the weak fragments by grinding rather than striking the fragment.
If you want to make stone tools in a traditional way, don't use a modern tool such as a file. Instead, use a pressure flaker made out of antler.
Push the antler against the edge of your fragment and slide it along the edge. If you push hard enough, flakes will break off. It is easy to get cut if you don't wear gloves.
Don't push down on the fragment with your pressure flaker. You will break the fragment that way. Instead, make sure the antler is underneath your fragment.
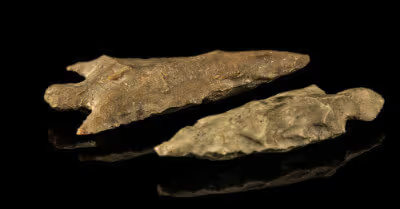
You can slowly but surely go from a long and thin fragment to an arrowhead if you work both sides evenly. Lastly, you will need to create notches at the base of your arrowhead if you want to attach it to a shaft. You will need another tool to do this, a long and thin notching tool that looks like a screwdriver.
Is making stone tools safe?
You need to take certain safety precautions. When you strike one stone against another, sharp flakes fly off, and they can cut you if you aren't careful.
Safety goggles are the most important. The worst thing that can happen to you is getting a sharp flake in your eye. Don't make tools without goggles any more than you would use a saw or a drill press without goggles.
Protection for other parts of your body is less crucial, but the flakes can still cut you. Wear gloves and appropriate clothing to protect yourself from flakes.
Making stone tools also creates dust, and it might be unhealthy to breathe the dust in. Most people don't wear a mask, but a dust mask is the safest way to do it. At least, make sure there is ventilation where you are making tools.
Don't leave tools or flakes lying around
Many people collect arrowheads and other tools they find outdoors. They could mistake your tools for authentic Native American artifacts. Don't interfere with the archeological record in this way.
If you make tools outside, clean up afterward. If you mess up a tool and don't want to keep it, don't leave it lying on the ground. Never pretend that the arrowheads you made are authentic antique arrowheads.
You should clean up stone chips as well as arrowheads. When I see flakes on the ground, I assume that there are stone tools buried nearby.
Collectors look for arrowheads by looking for signs that there was previously a camp nearby. If they see stone chips on the ground, they will falsely assume there is something to find.
Recent Articles


